If you have administrator rights to your Community CI system, you will have access to create new user accounts for your agency.
There are steps in the instructions below for the following
- Create the User – Step 2 -> 5
- Set User Access for Program / Stream – Steps 6
- Activate the User – Steps 7
Instructions
Step 1. Log into your Community CI system.
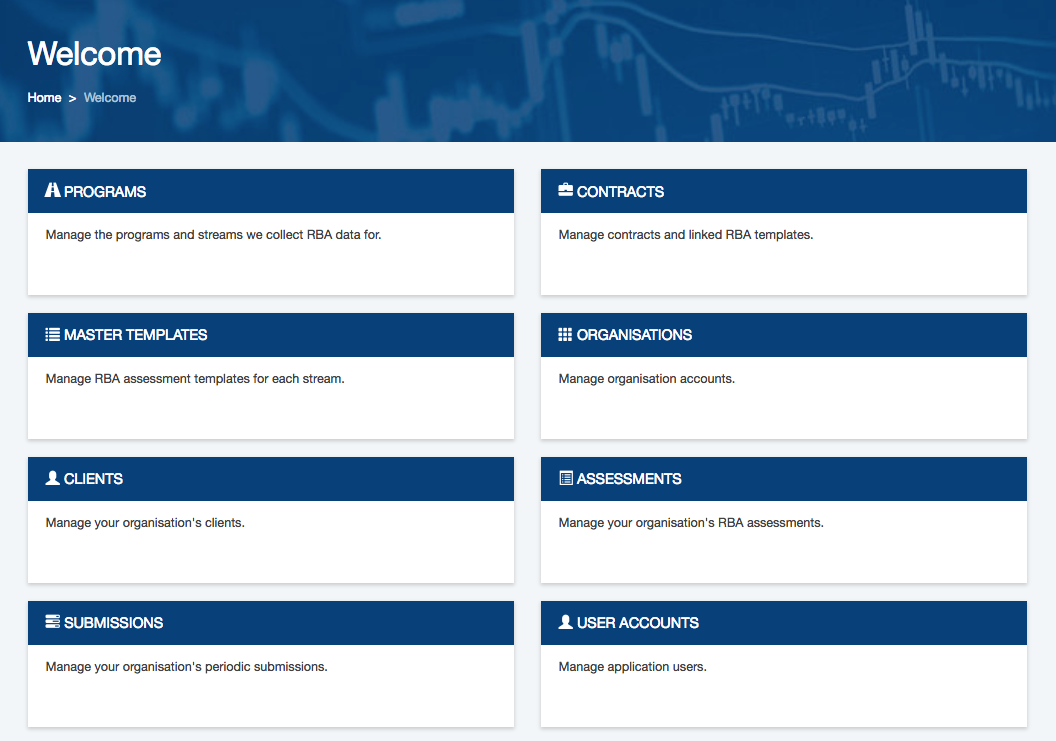
The welcome page will be displayed.
Create the User
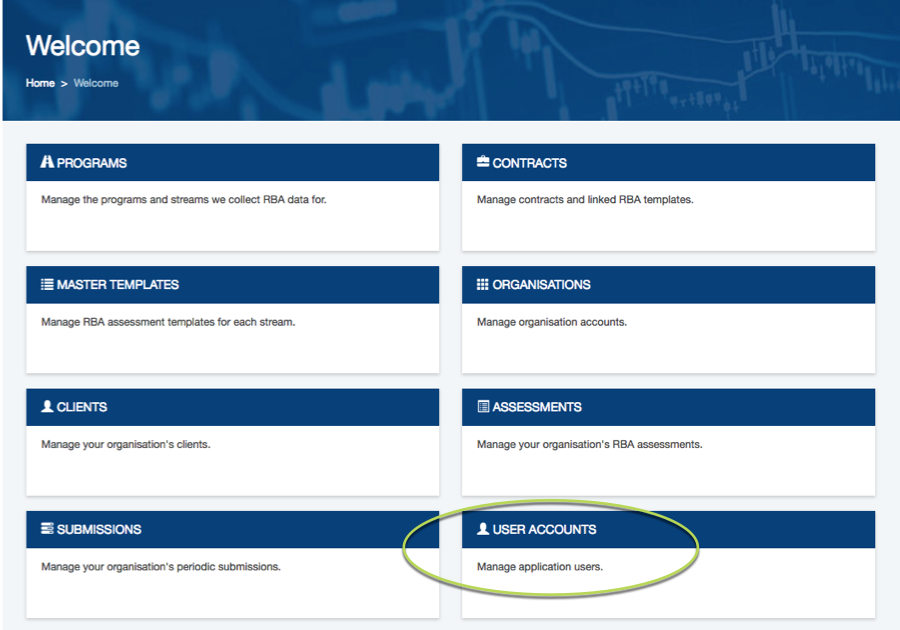
Step 2. On the welcome page, select the User Accounts option
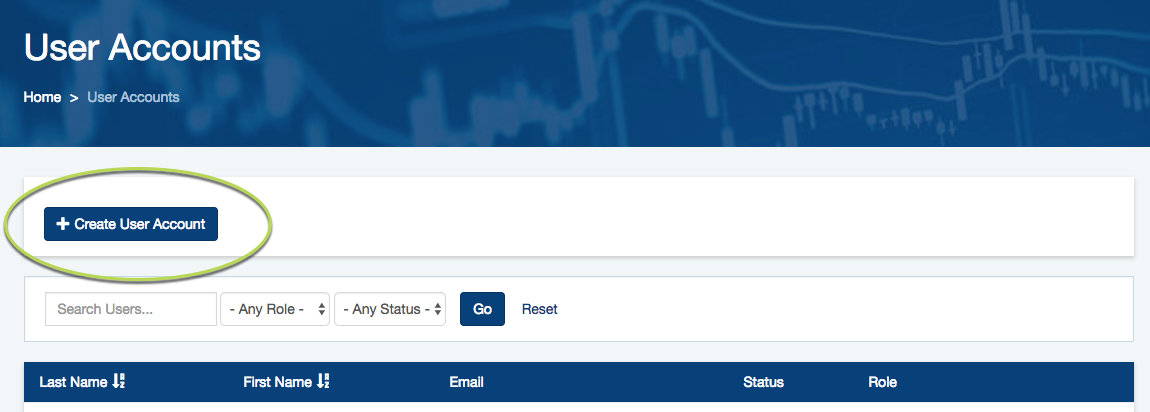
Step 3. Click Create User Account
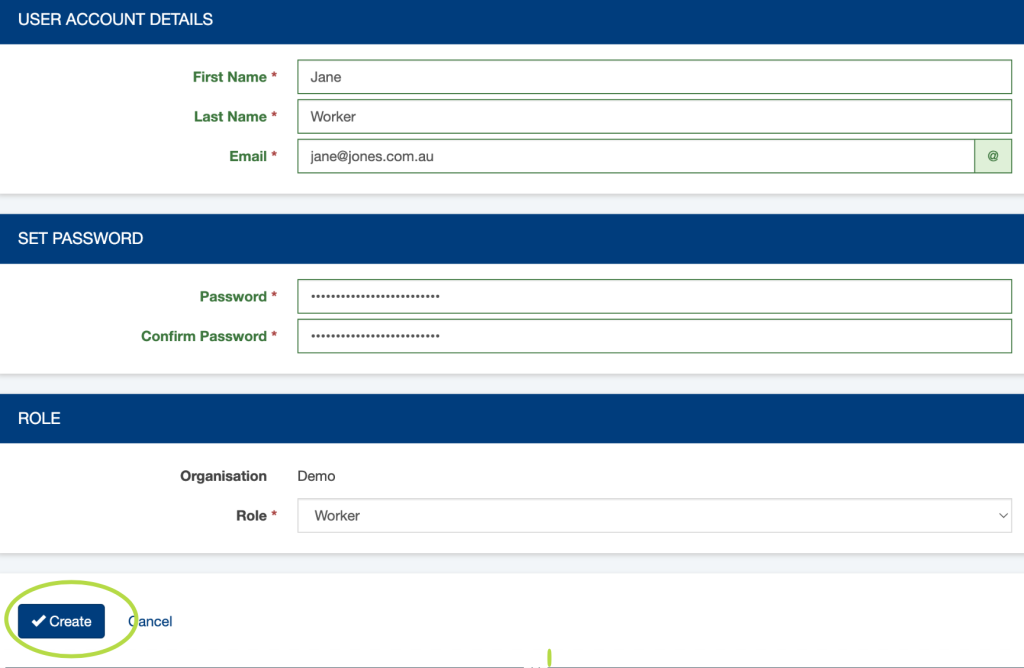
Step 4. Enter the required details in the Create User Account page
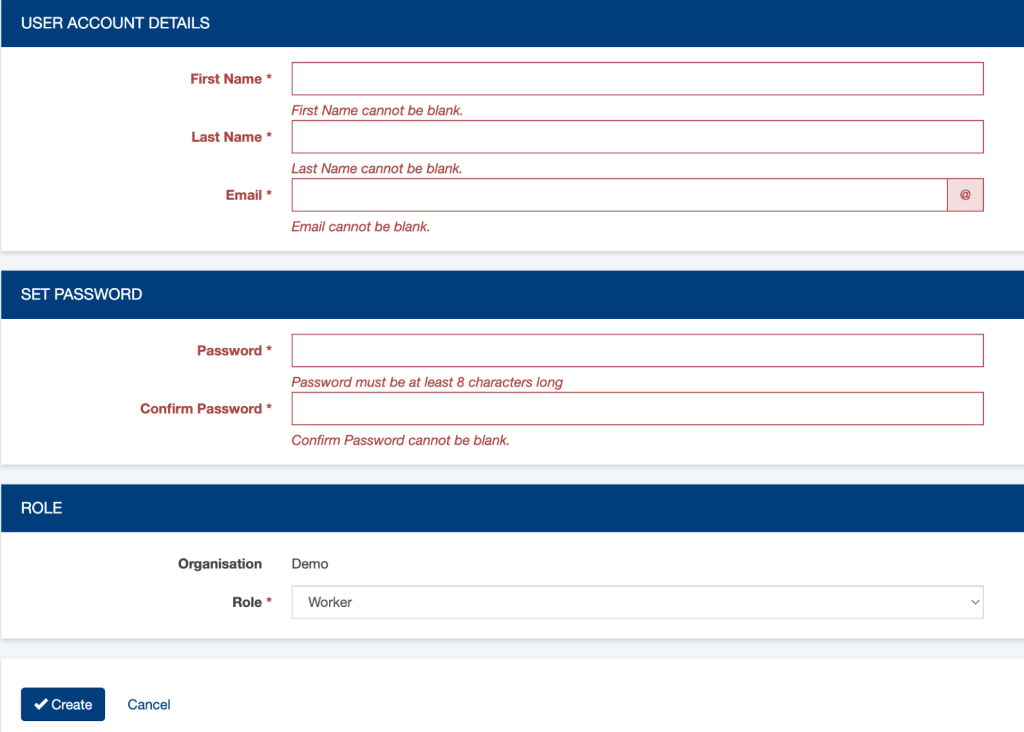
User Account Details:
- First Name
- Last Name
The email address is used as the login name. Ensure the email is correct as it will also be used to send password reset messages if required.
Set Password:
- Password
- Confirm Password
The password must meet the security requirements – the progress bar beneath the password field will display the strength of the password.
A password deemed very weak, weak, or so-so will not be accepted.
Longer passwords with a mix of cases, alphanumeric characters and special characters are stronger.
The same password must be entered in both the password and confirm password fields.
Role:
Select the required role for the user from the dropdown list.
- Administrator – an administrator account has access to all administrative features, including the creation of user accounts
- Manager – a manager account has access to all administrative features, excluding user accounts
- Worker – a worker account can create records, but cannot access any administrative features, such as reports or submissions
Step 5. When all fields have been completed successfully, click the create button
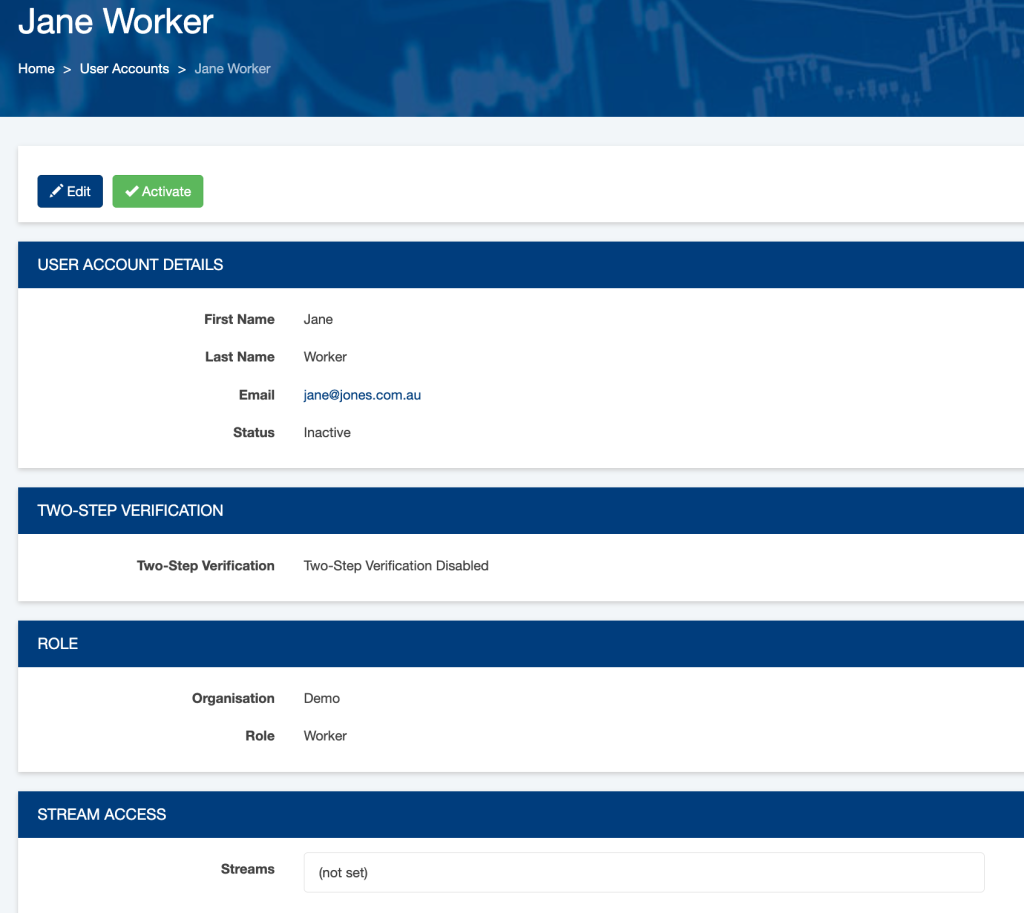
The user account is created in an inactive state
Set User Access for Program / Stream
Step 6. You now need to set the Program / Stream Access
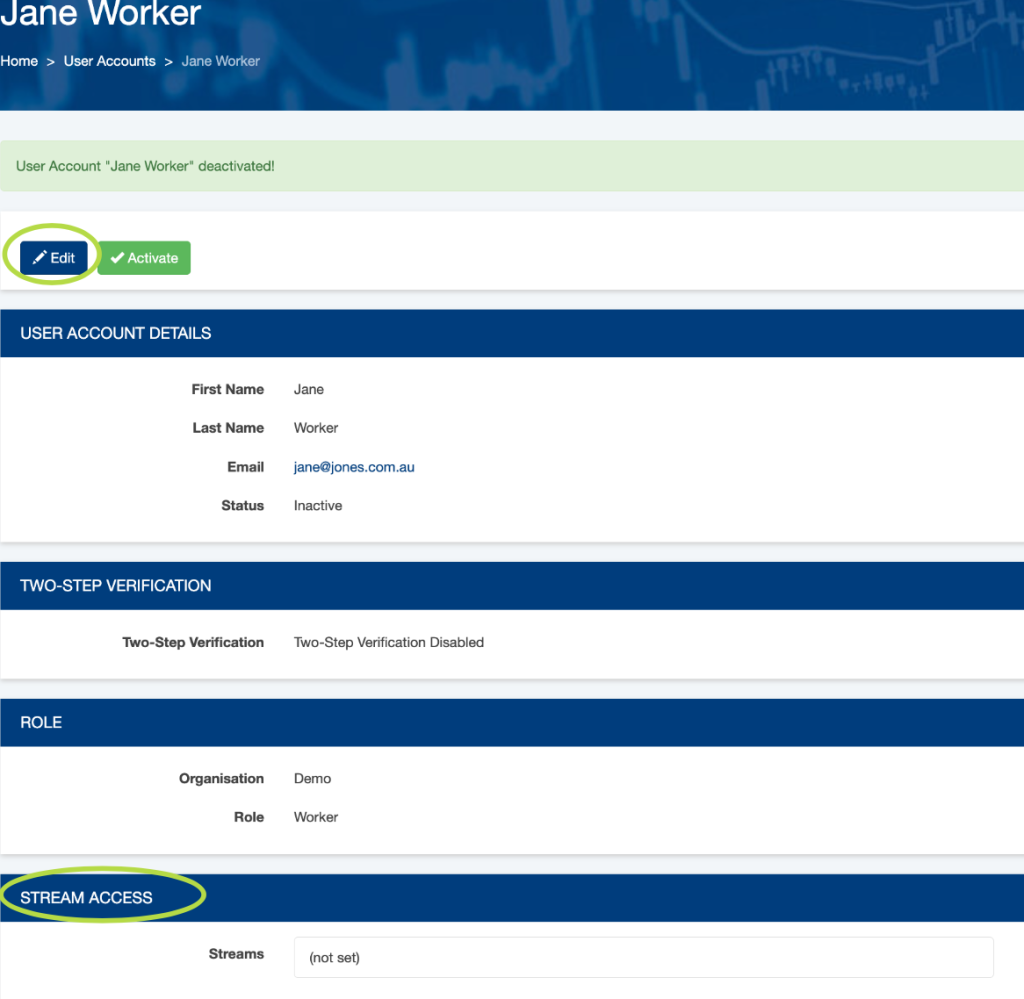
Click on Edit
Note:
- User with Admin and/or Manager Role will see all Streams, no need to set up
- User with Worker Role will not be able to see the Streams unless you give them access
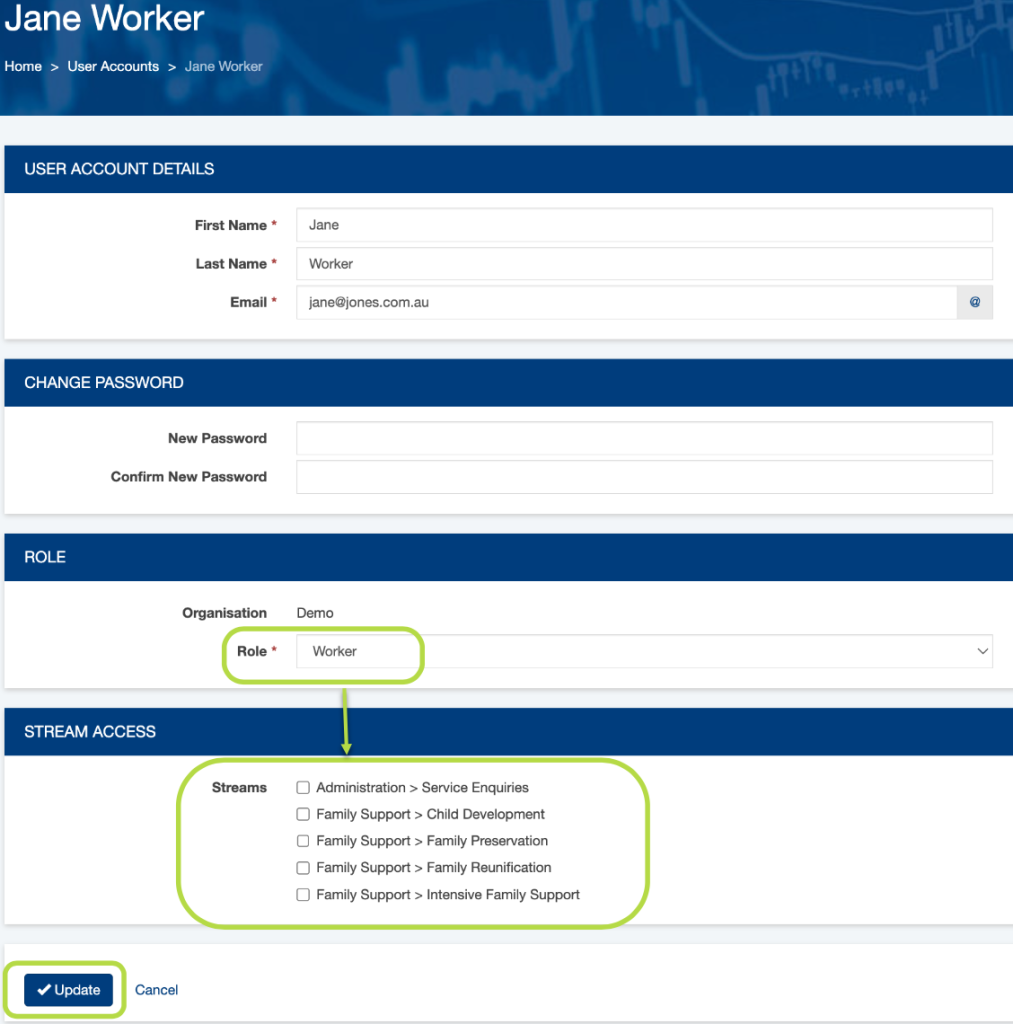
Select the check boxes on the Streams that you want to give the User access to
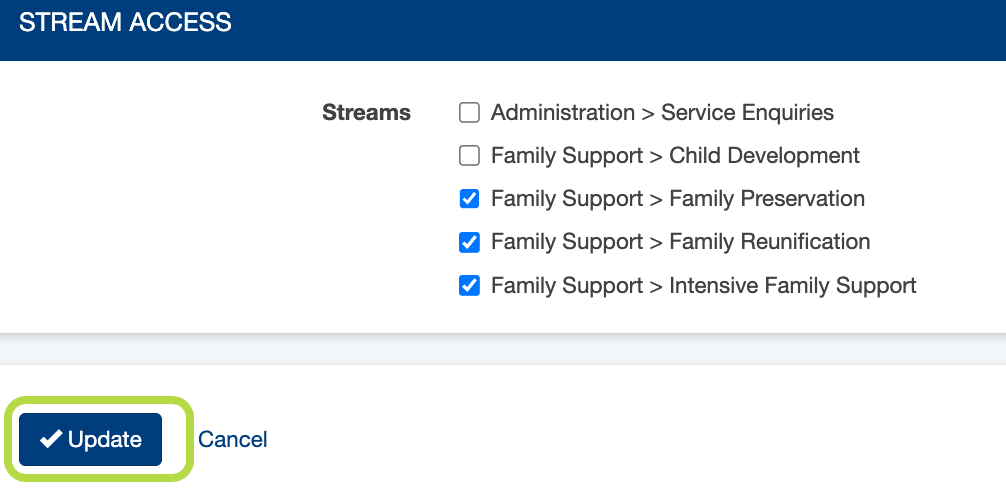
Then Click Update
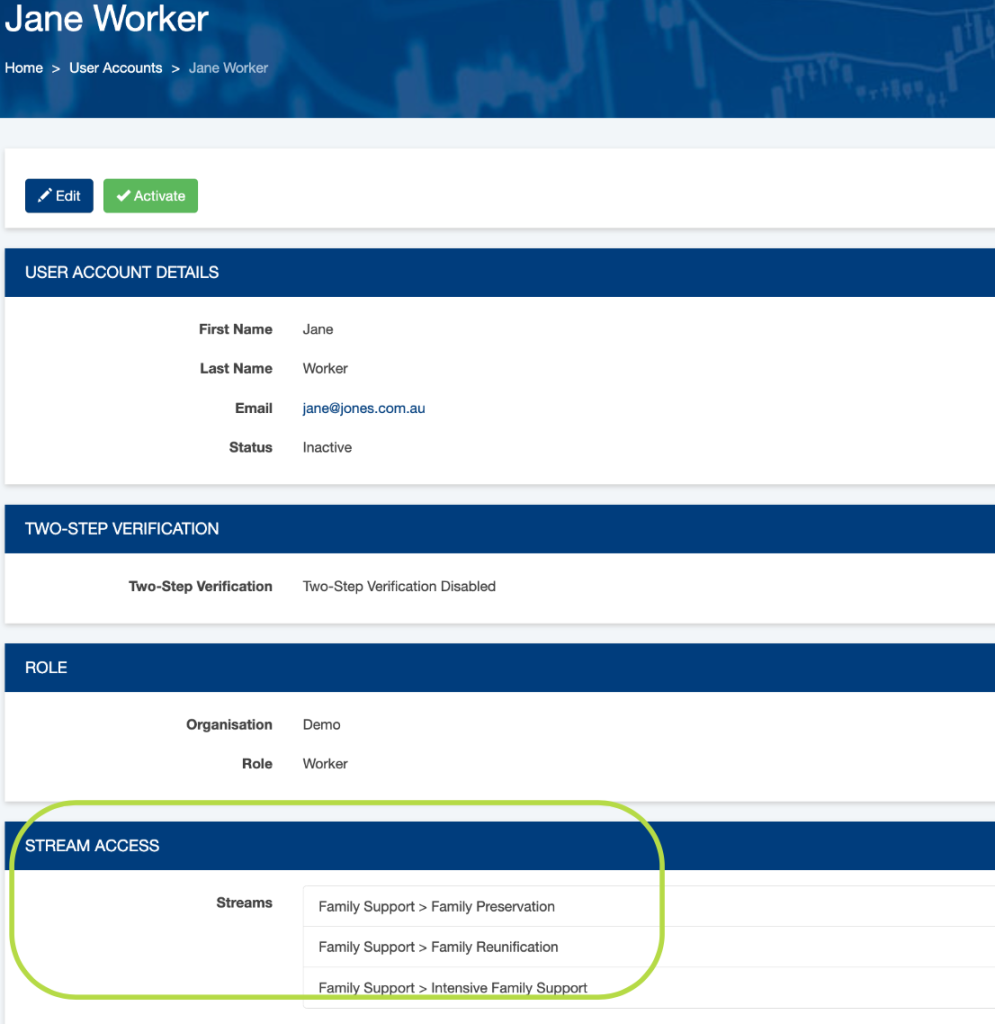
You will now see on the User account the Streams they have access to
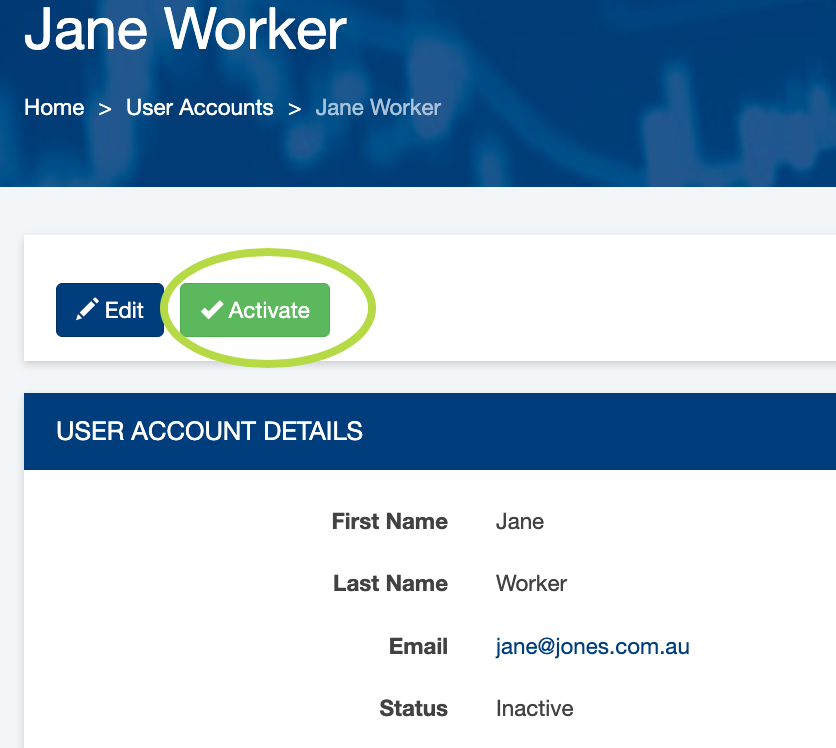
Activate the User Account
Step 7. Click the Activate button to activate the user record
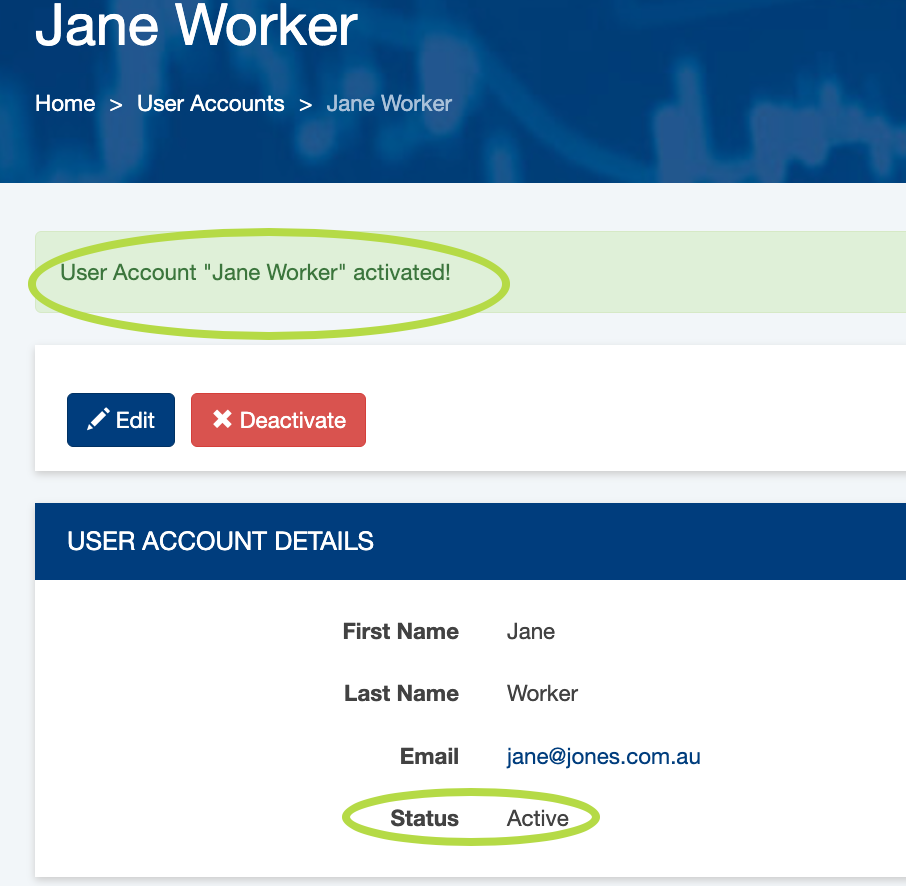
The user is active.
Further Information