If multiple client records saved outside of the Community CI system, you may choose to import them in bulk.
Using a client template will ensure the data is in the correct format.
Instructions
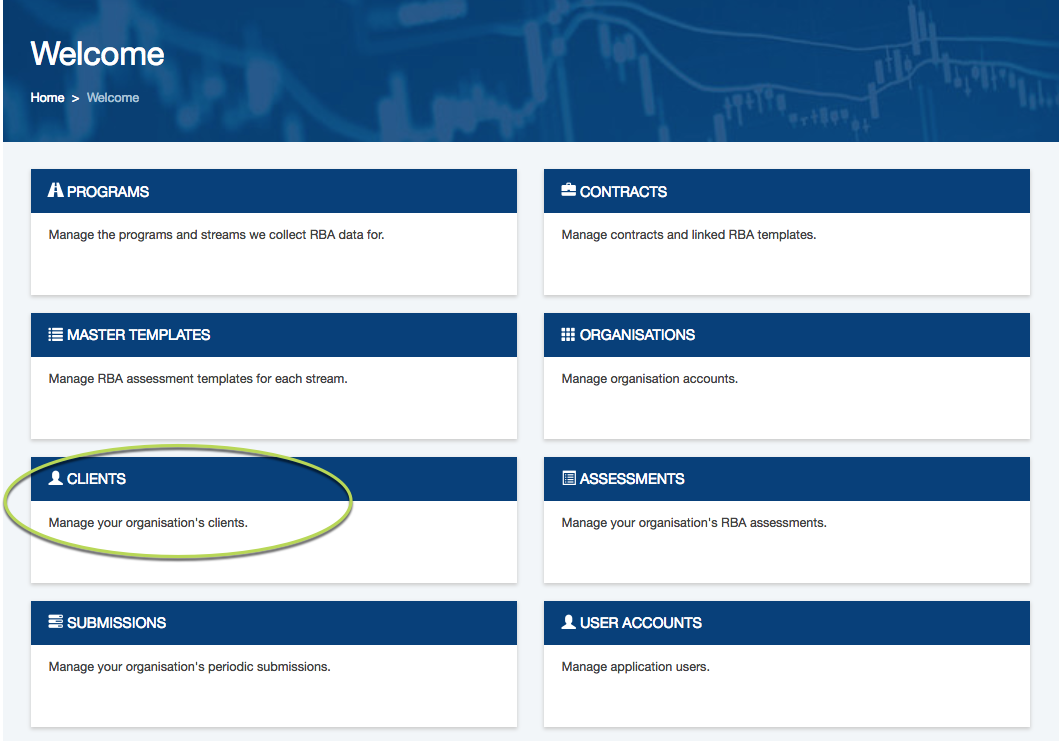
Step 1. Log into your Community CI system.
The welcome page will be displayed.
Step 2. Click on the Clients link.
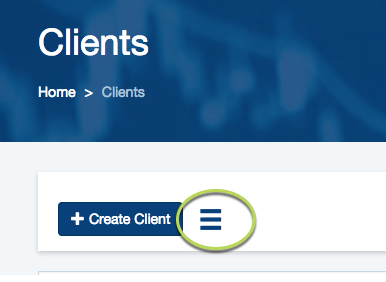
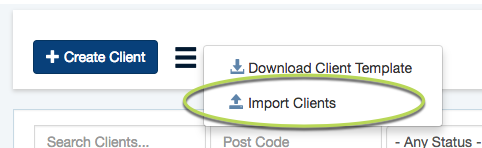
Step 3. Click on the menu button (3 lines) next to Create Client
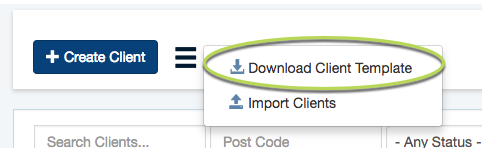
Step 4. Select Download Client Template
The template will be downloaded to your computer.
Step 5. Open the Client Export Template

Step 6. Enter your client information into the template
The Gender and ATSI/CALD fields contain a drop-down list that allows you to select valid options.
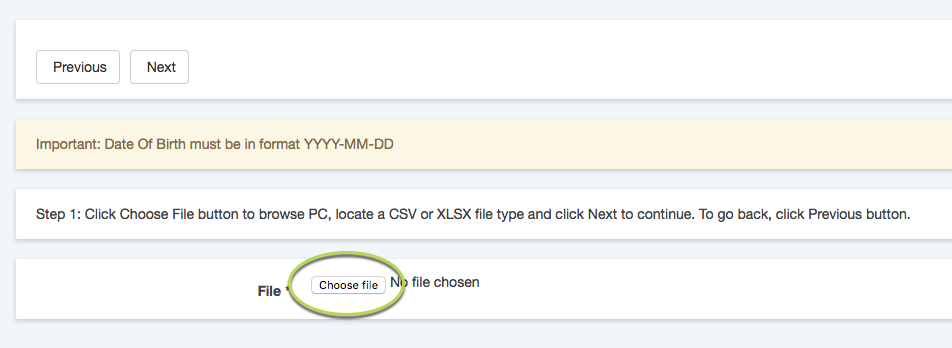
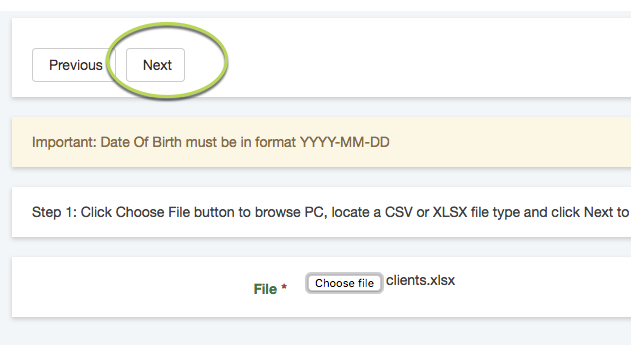
Tip: Date Of Birth must be in the format YYYY-MM-DD
Tip: Be sure to use the Unique Identifier field.
When importing multiple clients, duplicate records
are not flagged unless the Identifier is populated.
Step 7. Save the file
Step 8. Click on the menu button (3 lines) next to Create Client
Step 9. Select Import Clients
Step 10. Click Choose File
Step 11. Click Next
Step 12. Check that the column headers match (if you have used the import template the headers should be correct.
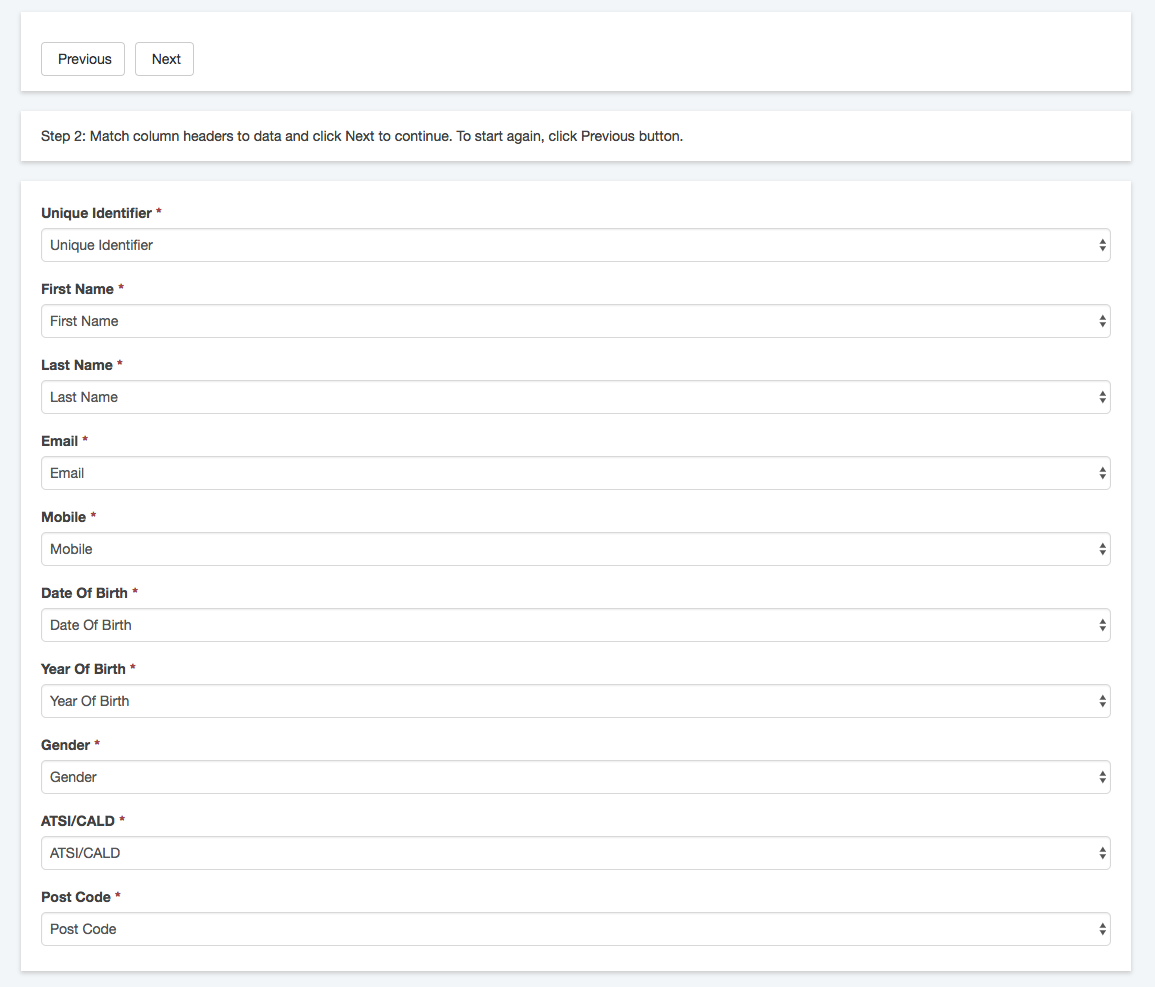
Step 13. Scroll to the records at the bottom of the page, check that the exported records are displayed and the fields are displayed under the correct headings.

Step 14. Click Next
The results of your upload will be displayed.
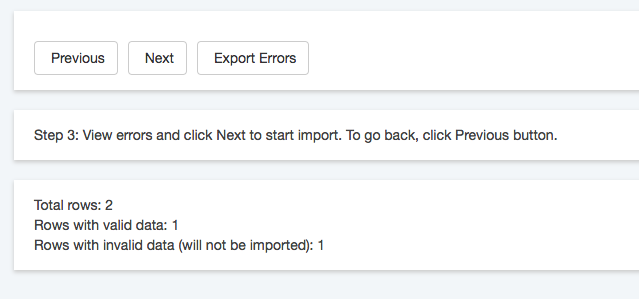
In this example one record has been imported, but the other has not.
To review the errors, click Export Errors.
A CSV file containing the errors is downloaded to your computer.

This record has errored because the mobile phone number is invalid.
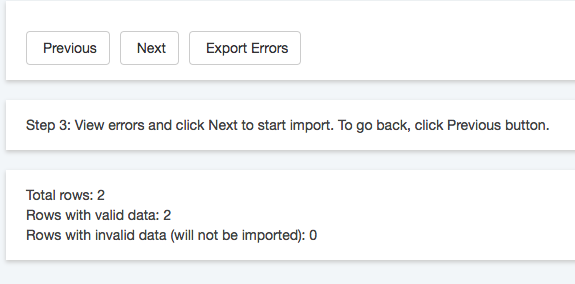
Step 15. To import only the correct records, click next.
Otherwise, edit your import file and start over from step 9 until no errors remain.
Step 16. Click Next
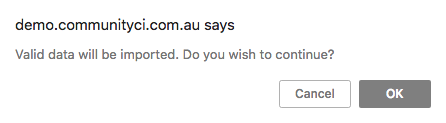
Step 17. Click OK to confirm the import
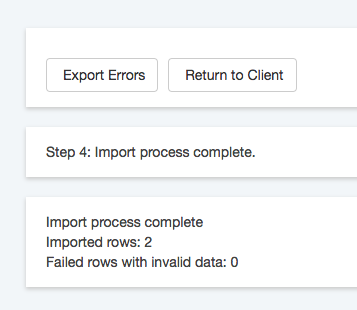
The data is imported successfully and a summary page is displayed
Further Information