There are a number of ways to record an assessment.
To record an assessment from a client record, follow the steps below.
Instructions
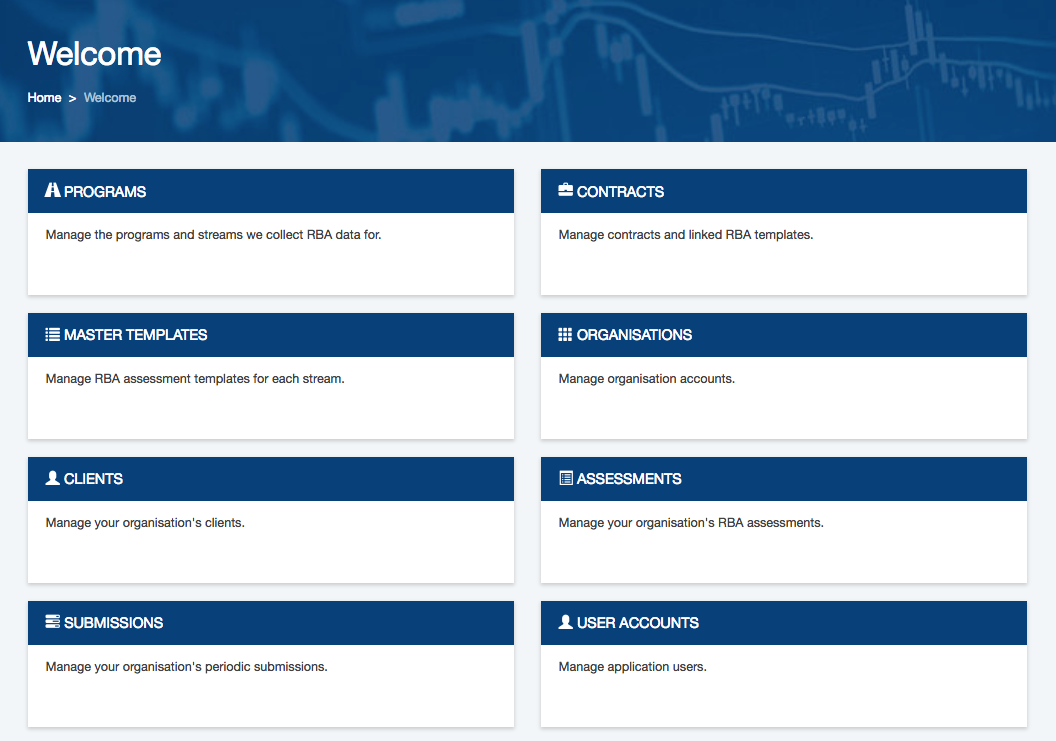
Step 1. Log into your Community CI system.
The welcome page will be displayed.
Step 2. Click on the Clients link.
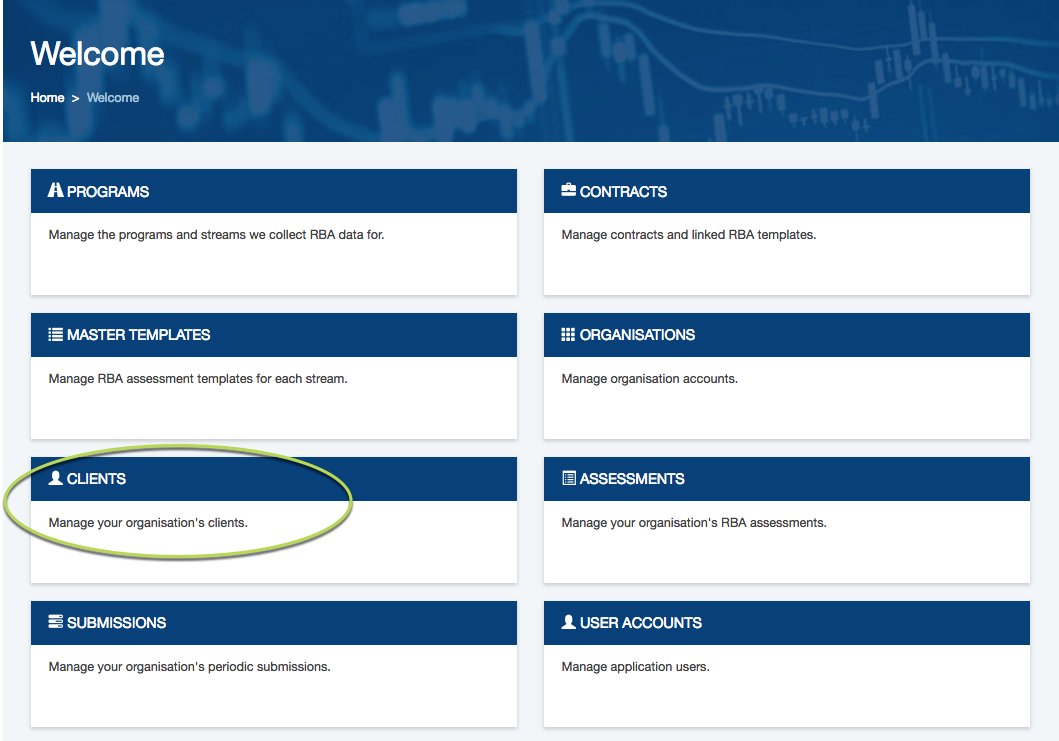
The Clients list will be displayed
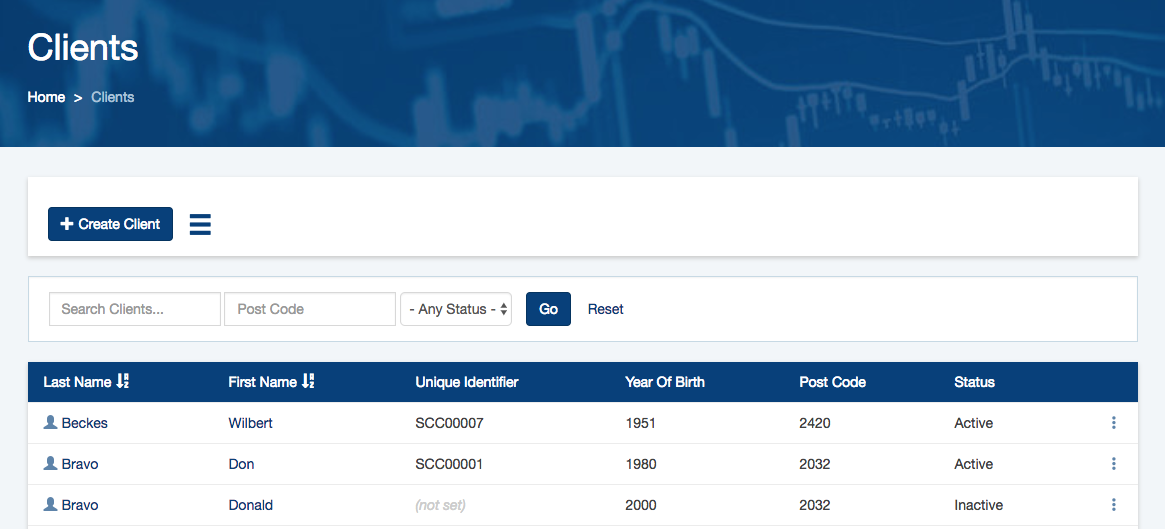
Step 3. If required, search for the required client (refer to Search for a Client )
Step 4. Click on the client name, or click the three dots on the right-hand side of the client and select Create Assessment.
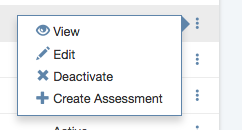
You can also click on the client to view the client record, then select Create Assessment from the menu (three lines) at the top of the page.

The Create Assessment page is displayed, with the Client name selected.
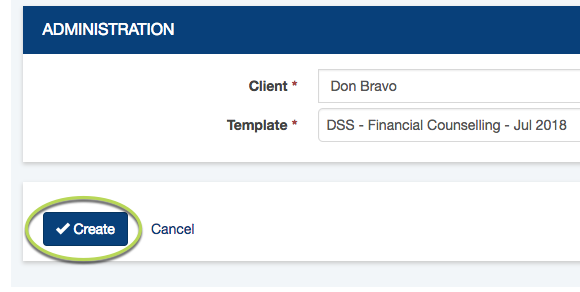
Step 5. Click on the template drop-down to select the required assessment template.

Step 6. Click Create
The assessment page is displayed
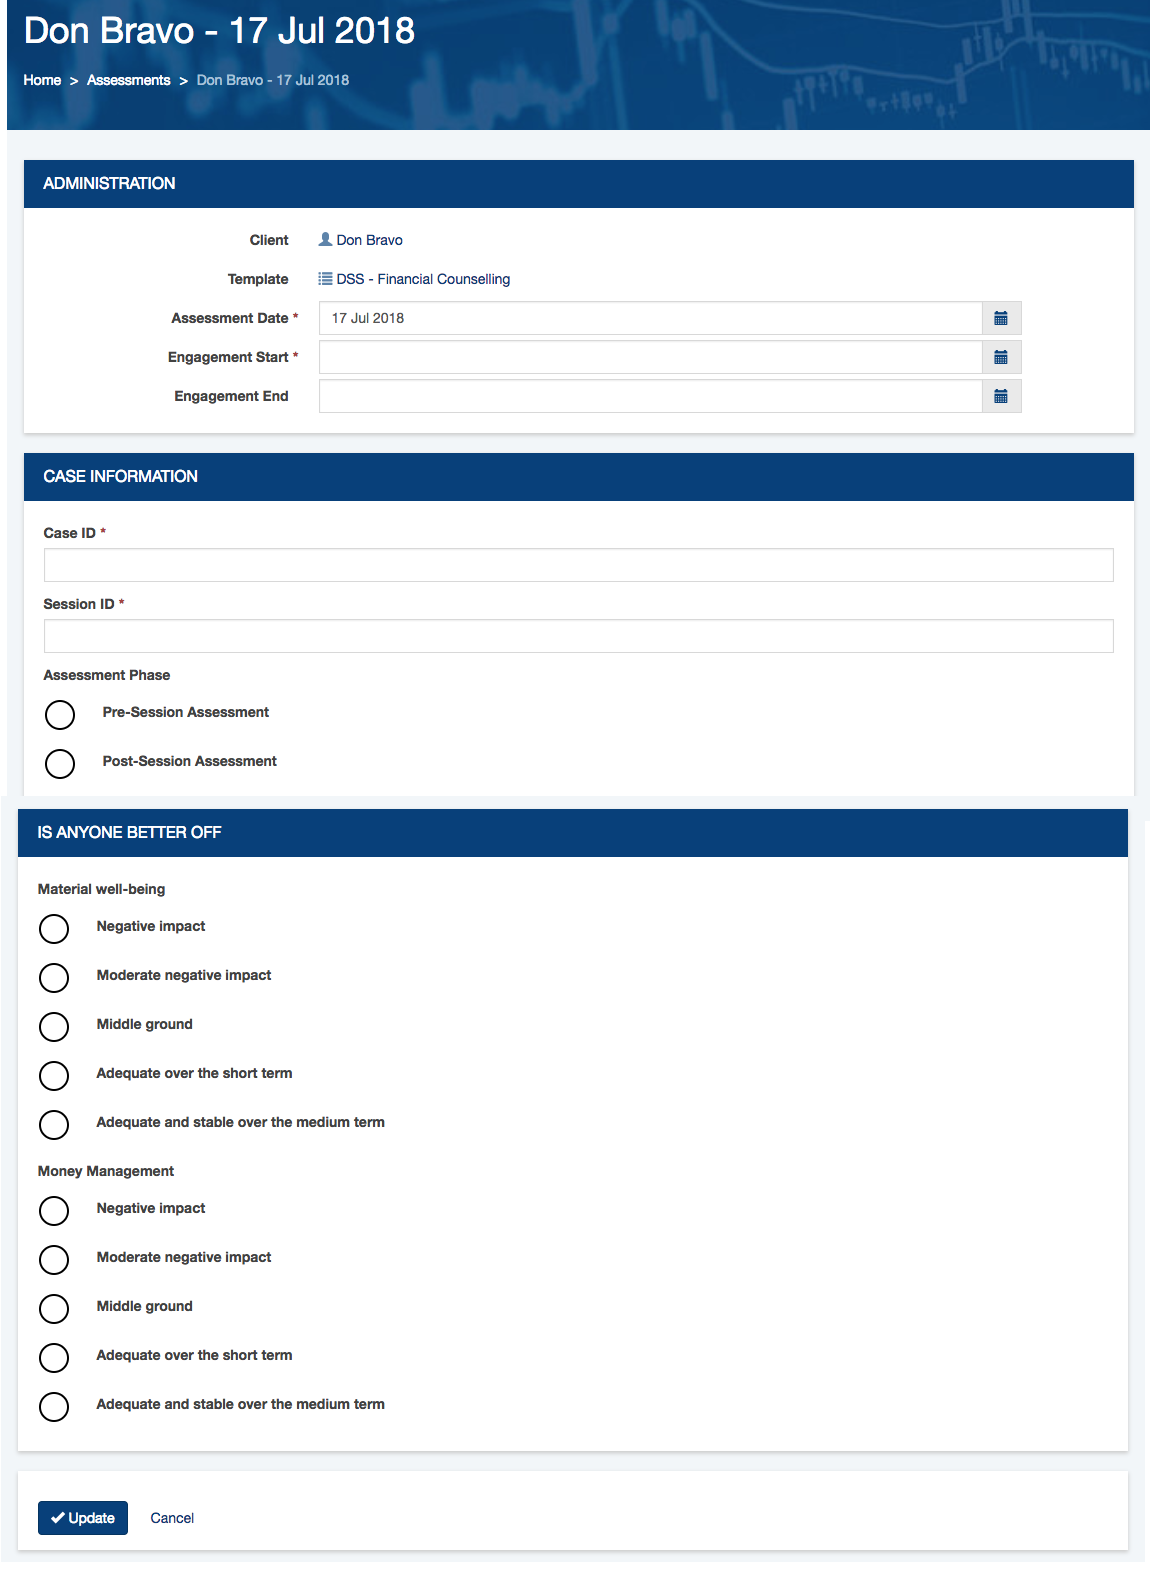
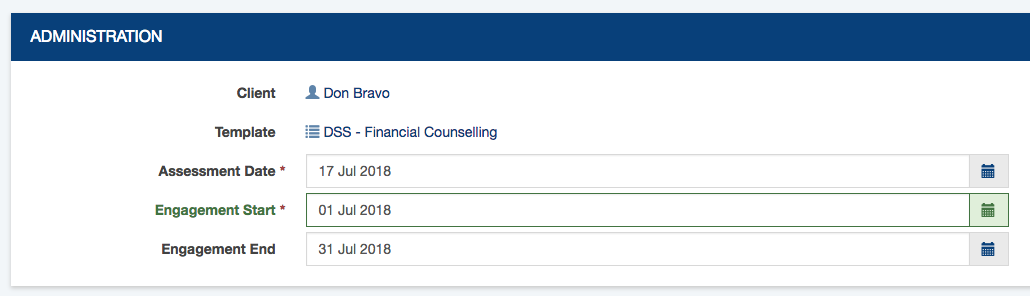
Step 7. Complete the Administration Section
- Confirm the Assessment Date (defaults to the current date)
- This date must fall within the valid dates for the template
- Select the Engagement Start Date
- This date must be before or on the assessment date
- Select the Engagement End Date (if applicable)
Step 8. Complete the Case Information Section
- Enter the Case ID for the selected Client
- This must be an integer
- Enter the Session ID for the selected Client and Case
- This must be an integer
- Select the Assessment phase (Pre or Post Session)

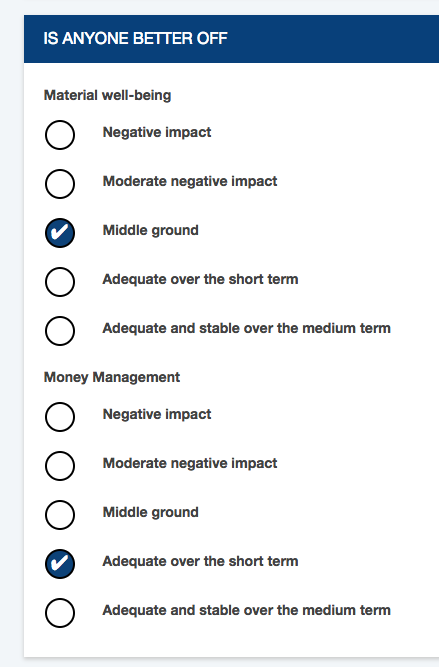
Step 9. Complete the Is Anyone Better Off Section
- Select a rating for each question
Tip: While your assessment is in Draft status,
it can be saved with no questions answered.

If you try to mark the assessment as complete
with no questions answered, you will receive an error.